Kup stronę 60% Taniej
BLACK MONTH
BLACK MONTH
Do końca 2 DNI : 2 GODZIN : 2 MINUT : 2 SEKUND
Categories.
WebWave drag and drop website builder lets you create unique websites. You can build your website from scratch by starting with a blank page, or choose various website templates from our free collection and modify them according to your needs. With WebWave website builder, you have a complete website design and hosting system at your fingertips.
This website was created with WebWave.
Find us online
Contact.
Email us at:
contact@webwave.me
Or use the chat (Mon-Fri)
Website builder.
Offer.
Useful articles.
Quick, even and easy elements alignment
Every webmaster creating a website in website builder WebWave CMS wants the project to look neat and tidy. Elements alignment is a crucial factor for reaching it. In this article you will learn how to align elements on the same level with accuracy up to 1px.
For your comfort WebWave created two ways to set elements on a website in equal rows exactly where you want it to be
- Same space vertically
- Same space horizontally
- To the left
- To the center (horizontally)
- To the right
- To the top
- To the center (vertically)
- To the bottom
Guides
A guide is a horizontal or vertical line that allows you to easily snap elements to it. Guides are visible in website builder on every subpage, so creating a similar page won't be a problem.
You can add as many guides as you need. They can be easily removed or hidden. You can also make elements not snap to guides.
Add guides
The vertical or horizontal guide can be added in two different ways:
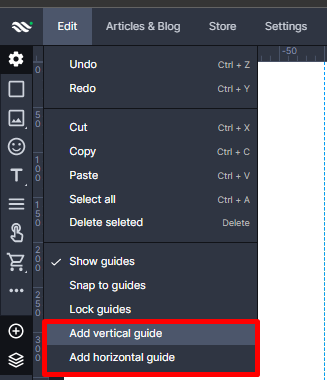
- In website builder select "Edit" from the main menu and "Add vertical guide"/"Add horizontal guide".
A new guide will appear in the center of the website.
- You can also drag a vertical guide from a scale on the left side of the builder or a horizontal guide from the scale at the top.
Move guides
In order to change a guide location in website builder WebWave, you need to click on it and simply move it wherever you want. When you start doing it, you will see a number in pixels which represents a distance from the beginning of a website.
Delete guides
In order to remove a guide, click on it and drag it out of the working area.
Keep in mind that when you delete a guide, you delete it on every subpage in the builder.
Hide guides
If for some reason you want to hide all the guides in the builder, go to "Edit" and click on "Show Guides" to make the selection icon disappear
Snap to guides
When you add an element to your website and want to place it regardless of the guides, go to "Edit" and click in "Snap to guides" to make the selection icon disappear. Now elements won't automatically snap to the guides and you can place them wherever you want them to.
If you want elements to snap to guides again, go to this very place.
If you want to align only one element without snapping to guides, press Ctrl while moving element. It will make the element ignore guides.
Align a few elements at once
If you want a couple of elements to be aligned on the same level, use elements relations.
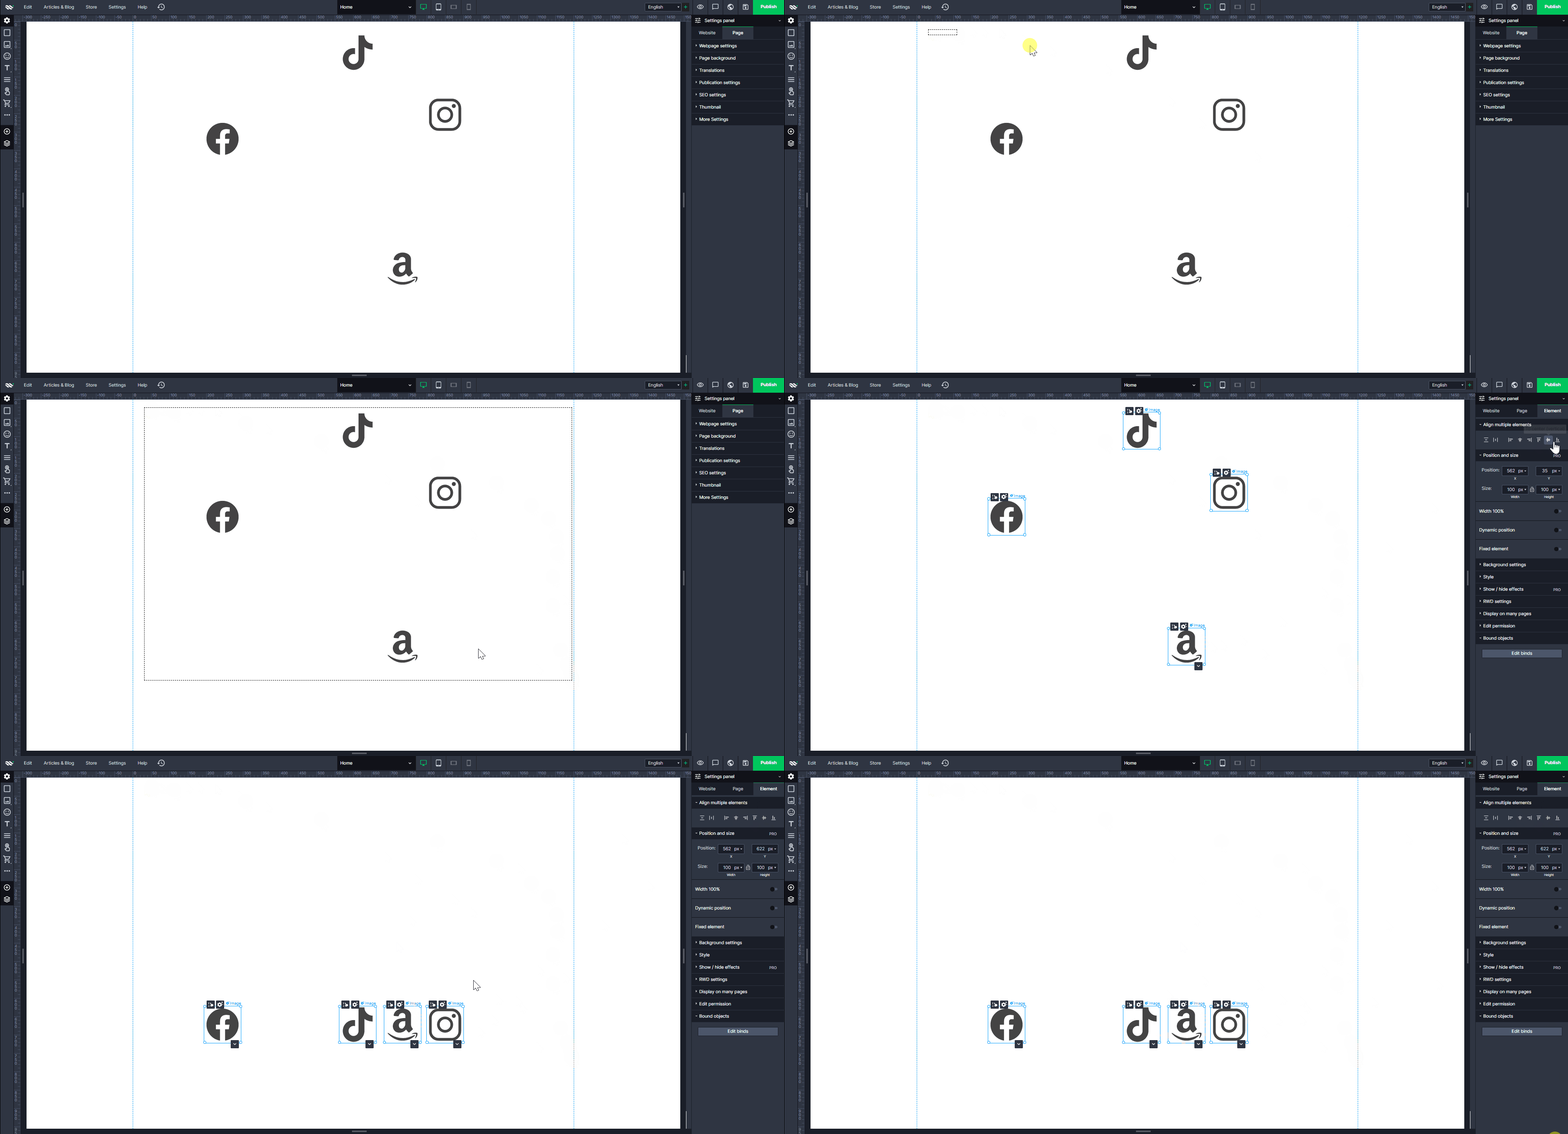
To align a few elements, select them all. In the Settings Panel go to "Align multiple elements" and set:
Same space vertically
This feature places elements vertically on the same distance from each other.
Same space horizontally
This feature places elements horizontally on the same distance from each other.
To the left
This feature aligns elements to the left edge of the most propounded element.
To the center (horizontal)
This feature aligns elements to the center (horizontally).
To the right
This feature aligns elements to the right edge of the most propounded element.
To the top
This feature aligns elements to the top edge of the most propounded element.
To the center (vertical)
This feature aligns elements to the center vertically.
To the bottom
This feature aligns elements to the bottom edge of the most propounded element.

Position and size
Change the position and size of your elements using mathematical expressions. For position and size, you can use the following expressions:
Addition:
Subtraction:
Multiplication:
Division:


